

Step 1: Print

Once we design, we print each layer on a Propalcote paper (like the used to print the magazines) , to finalize the design know the dimensions so the plate will acquire a copper-clad board be a little larger than the dimensions of our design.
Designing Softwares in common -Oracd,Eaglecad,SImplePcb etc.Step 2: Cleaning

Once we have the copper-clad board is recommended to clean the grip toner, in this case, we clean with a sponge to wash the pots. After cleaning the copper-clad board is necessary to avoid contact our fingers with copper to prevent staining of fat, I recommend using latex gloves will be useful later.
Step 3: Cut and paste

At this point we turn to the scissors and tape, we will cut one of the prints. When we cut the print to leave some more paper for something like fins in combination with the tape can hold more paper to the copper-clad board.
Step 4: Iron

Now comes the part that usually make some mistakes, but with practice can be avoided. With the board we will transfer the toner to the copper-clad board with this protect our circuit tracks of acid attack. As I mentioned before this part is somewhat critical, because if you apply heat for a short time toner not going to be well attached to copper and if we apply heat for too long the toner will distribute the copper causing it to deform tracks. I usually set the iron at the peak (cotton, linen), applied without steam and heat for about 8 or 10 minutes, it is important to review the edges.
Step 5: Cleaning

Immediately after ironing board, place it in a container with water at room temperature and keep it there until the paper takes a clear tone and can see the tracks. After keeping it in the water, proceed to remove the paper, this process should be done with great care, they might accidentally remove a clue, the role is removed with the fingertips or in some cases, when we are confident that the toner stay well attached to copper can use a brush carefully.
Step 5: Etching
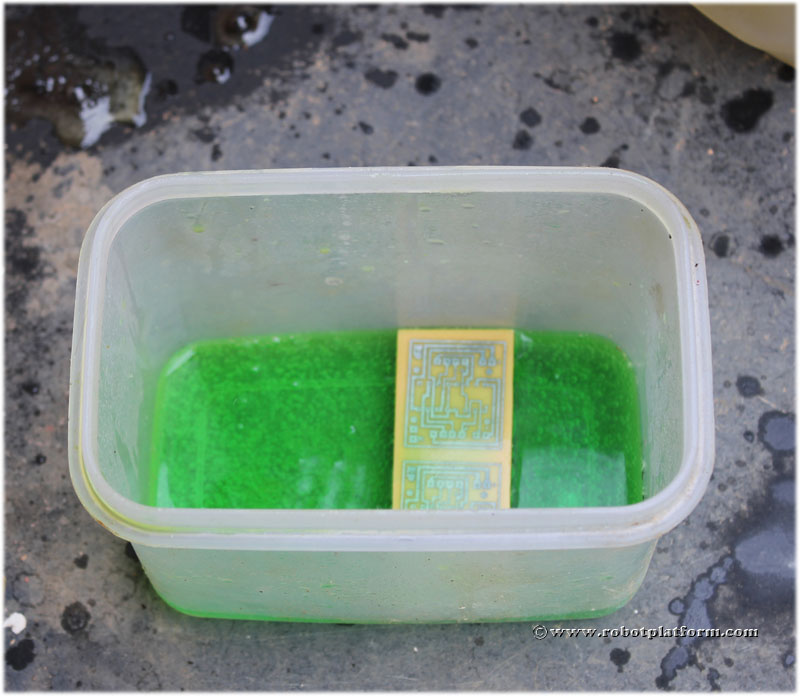
Now comes the time of the attack with acid, the acid slowly eat up the copper is exposed and which is protected by the toner, we must shake and move a little plaque during this process to help disperse the excess copper can be used hot acid (water bath at about 30 degrees) so that the process is shorter. To move the plate during this process I recommend using latex gloves, acid can irritate the skin.
Etching Solutions - Ferric Chloride
Step 5: Done

When we see all the tracks are well defined, we can remove the plate and give an acid bath to clean well. Then remove the toner to stay on track with the help of the sponge, we can also use a bit of acetone to speed up the process. In some cases the PCBs go with the layer components to this layer also print it on paper and ironed Propalcote, then remove the paper and the above process and ready.
 That's it Folks


No comments:
Post a Comment
Note: only a member of this blog may post a comment.